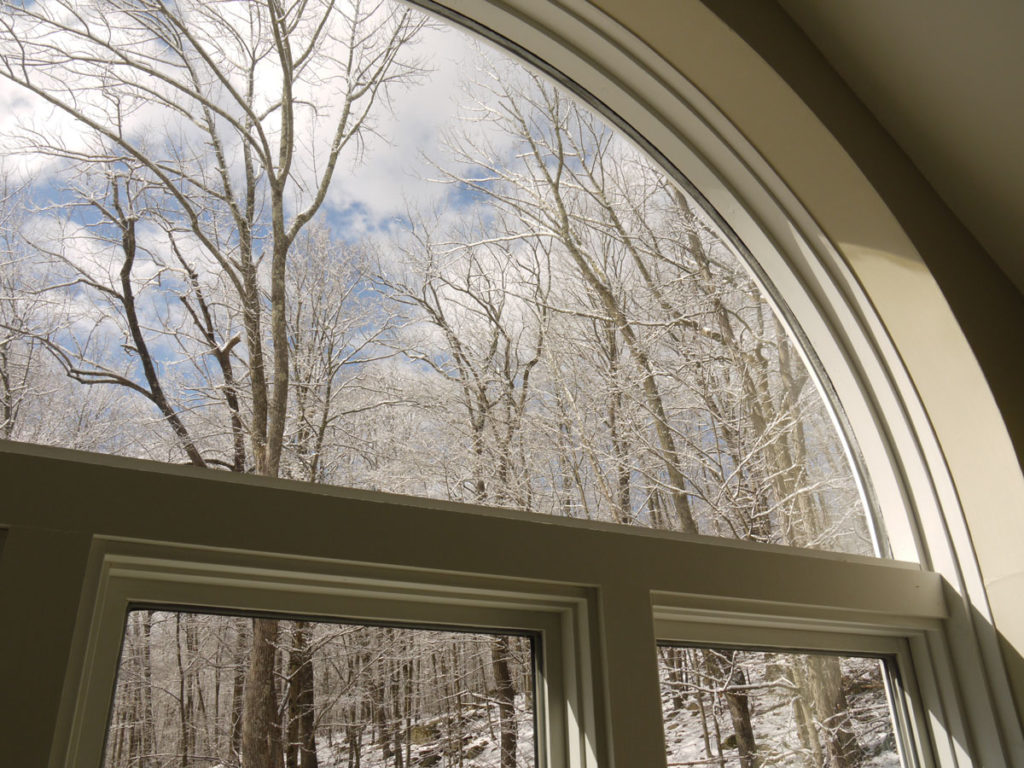
This particular window was manufactured by Caradco, a company that was bought out by Jeld-Wen. When ordering windows back in 1998, I went with Caradco because they had more glass area and were less expensive than many other major brands. The company had been around for many years and seemed to build a good product. Turns out there were manufacturing and engineering issues with the aluminum clad wood windows which caused wood components to rot out and glass to fog up. That lead to some class action lawsuits. Bottom line: the company is gone and the windows are no longer available. There are several window and sash replacement kits available but not the fixed circle tops. To remove, clean (if possible) and reassemble the large insulated glass would cost several hundred dollars at the very least. Same for having a replacement window built. I had to see if I could do this myself.
The biggest and most cost-saving surprise was to find I could remove the inner glass while keeping the outer pane in place. I used a long and thin piece of metal, sharpened one edge, and worked it between the glass to cut the mastic divider. This was made easier by using a hair dryer to heat the mastic as I went along. The glass is heavy so I recommend assistance when moving it out of the frame.
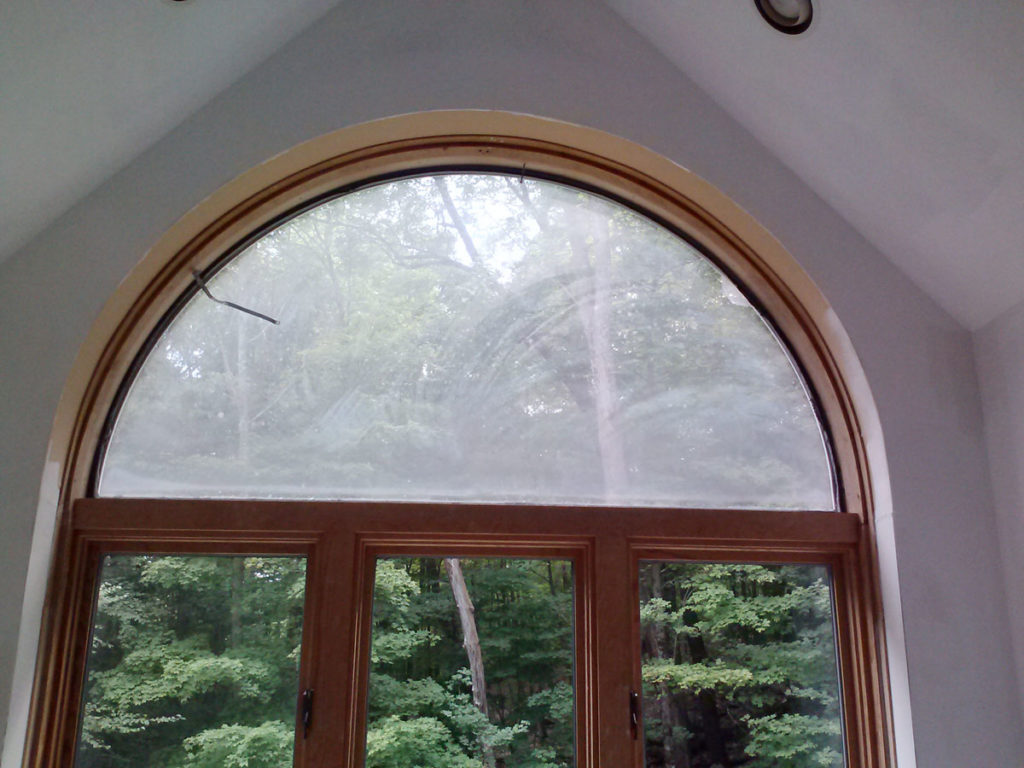
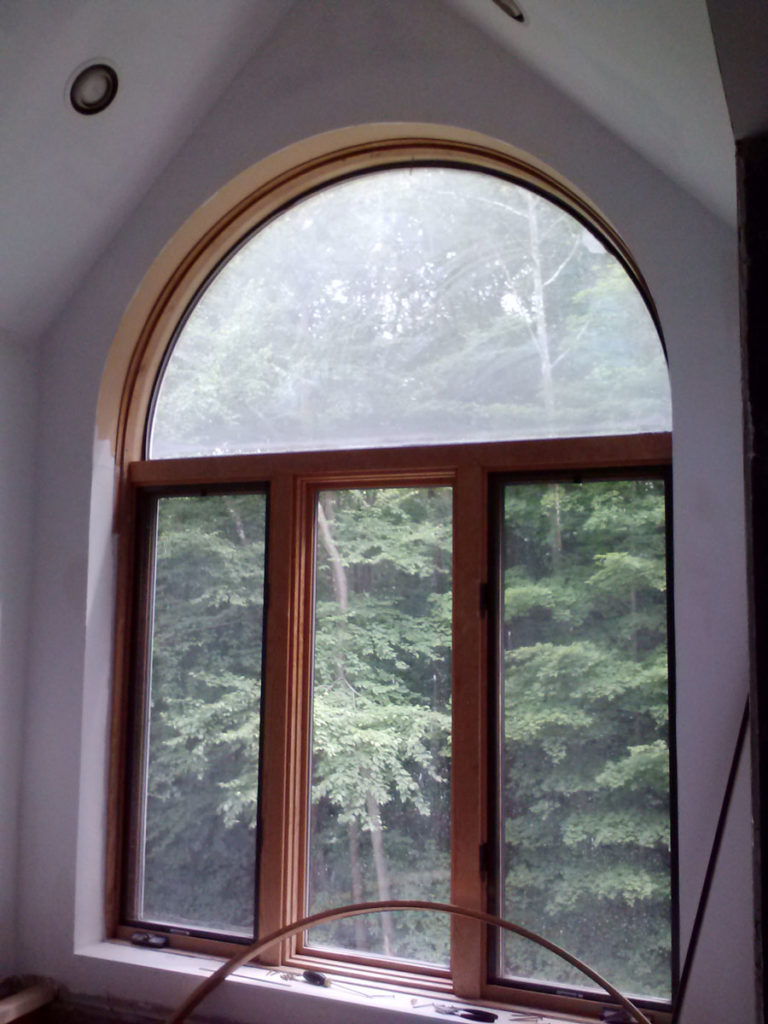
Cleaning the glass would be a breeze I thought. But it was not! I tried window cleaner, oven cleaner, lime calcium rust remover, ammonia, vinegar, steel wool, and scraping with a razor blade. Each one helped a little and it finally cleared. Looking back, I would start with vinegar and be very careful with steel wood and scraping to minimize scratches.
Before placing the glass back into the frame I tried to even out the mastic as much as possible. With the glass pressed back in place I bridged the cut mastic with strips of duct tape all around the edges. It should be a continuous seal. I found it easier to work with 1 inch wide, 1 foot long strips slightly overlapped. A better option may be to add a bead of mastic on top of the existing seal as long as it doesn’t squeeze out between the glass panes. Don’t forget to add that safety screw at the top just in case! Once the window is completely sealed, remove the screw and reinstall the trim to permanently hold the window in place.

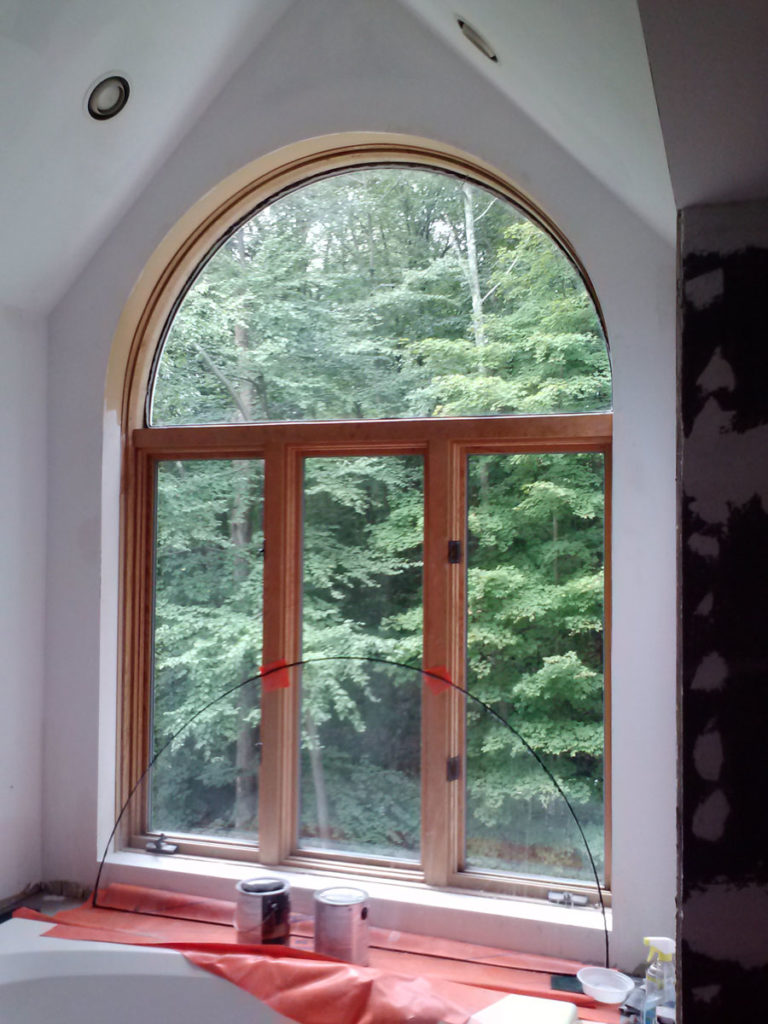
Summary: The difference is like night and day! This was a good fix, especially for a window with no factory replacement available. By using items I already had at home, I didn’t spend a dime. On the down side, it was not easy! And the insulating ability (R-value) is likely reduced due to the lack of the factory sealed Argon gas filling.